Field Repairs: Fixing Zips, Seams, and Tears When You’re Days From a Shop

Master field repairs for outdoor gear, from broken zippers and worn zipper teeth to fabric tears and shoulder straps. Discover how to fix a zipper and build a compact field repair kit.
You rarely notice a zipper until it stops doing what it’s supposed to do.
One moment, you pull the zip on your jacket, and it closes cleanly. Next, it separates behind the slider and leaves you standing in wet wind with half your outdoor gear open to the elements. That’s usually how field repairs begin, not dramatically, just inconveniently enough to matter.
When you’re days from a shop, inconvenience turns into responsibility. You either understand how to fix a zipper, patch fabric, or stabilize shoulder straps, or you start losing control of your gear one small failure at a time.
Field repairs aren’t about making things look new. They’re about making sure broken doesn’t become unusable.
Field Repairs Start Before You Touch the Gear

The instinct is to grab your tools immediately, needle-nose pliers, a knife, scissors, thread, and start fixing the problem on the spot, but in most cases, the first move shouldn’t be mechanical at all; it should be structural, focused on reducing tension and stabilizing the damage before you attempt any repair.
If a broken zipper appeared under tension, reduce tension. If a tear forms near a pack strap, unload the pack. If the zipper on a sleeping bag splits in cold air, stop pulling it harder.
Most zipper issues escalate because we keep pulling.
Field repairs in remote conditions require a pause. Look at both sides. Check if the zipper teeth are misaligned. See whether dirt is stuck between them. Inspect the slider before assuming the entire zipper is finished.
Zippers most often fail for two basic reasons: overuse and underuse. Overuse stretches the slider so it can no longer press the teeth together. Underuse lets moisture and grit settle into the track of an old zipper stored too long without care. Both problems look identical at first glance.
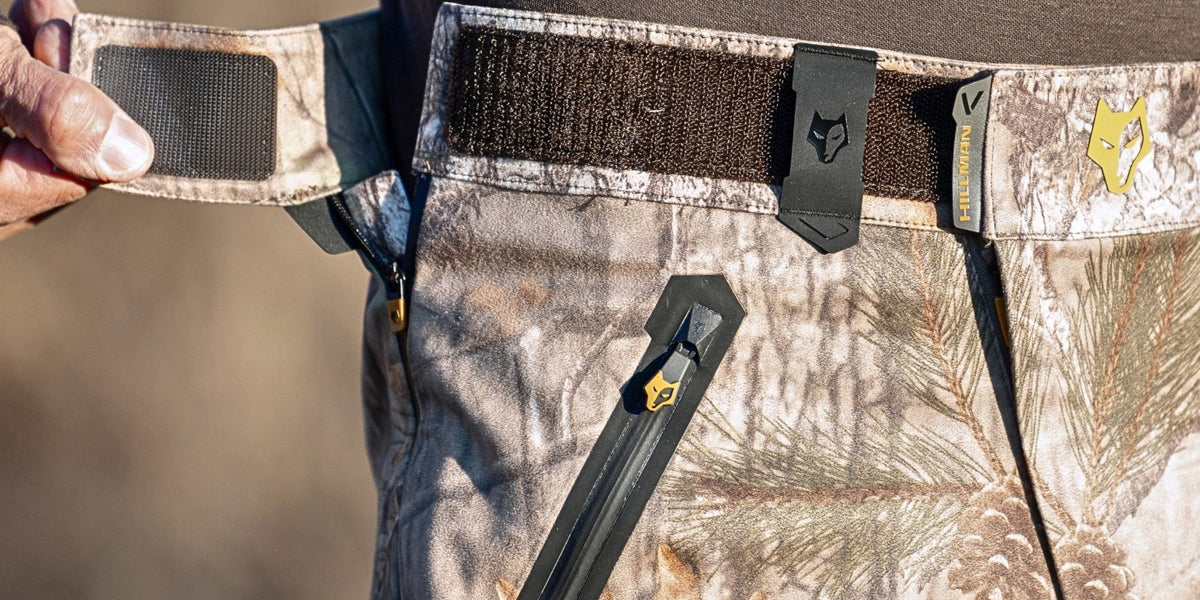
Zipper Slider Problems – The Real Cause of a Broken Zipper

When the zip separates behind the slider, most people assume the teeth are gone. Usually, they aren’t.
The slider wears down slowly. It widens just enough that it stops engaging the teeth tightly. The two sides still exist. They just don’t meet with pressure anymore.
This is where needle-nose pliers become useful. Not aggressively. Carefully.
Crimp the zipper slider slightly. Pinch. Test. Pinch again. Small adjustments. You’re not crushing metal, you’re tightening the tolerance. When the slider regains pressure, the zipper teeth reconnect, and the jacket closes again.
It feels almost too simple, but this quick fix saves more gear than a full replacement ever does.
If that doesn’t work, the next step isn’t frustration. It’s an inspection.
Look closely at the teeth. Dirt caught in the track can stop the slider from moving properly. A stuck zipper is often just debris in one side of the track. Use the tip of a knife or needle gently to clear it. Don’t pry hard. Don’t force movement. Zippers respond better to patience than pressure.
Replacing the Slider When Tightening Fails

Sometimes the slider is simply worn beyond tightening. In that case, replacing it is the cleanest solution.
To replace a zipper slider, you need to remove the zipper stopper at the top. That small metal or plastic top stop prevents the slider from sliding off. Using pliers, carefully pry it open. Once removed, slide off the old slider.
Now comes the part people often get wrong. The new slider must be the same size and match the same side orientation as the original. A mismatch causes new zipper issues immediately.
Slide the replacement slider onto both sides evenly. Make sure the teeth feed cleanly. Then reinstall a zipper stop. If you don’t have a spare stopper in your field repair kit, a tight set of stitches across the top can function as a temporary stop.
If the zipper pull has been lost, that’s cosmetic. Attach the cord through the hole. The zip works the same. A broken zipper often sounds final. In reality, it’s usually just a worn slider.
When Tape Is the Only Immediate Solution

There are moments when a zipper won’t cooperate at all. The slider may be bent. Teeth may be damaged. Plastic tracks may be cracked.
In wet weather, especially on a tent or jacket, containment matters more than elegance. Duct tape across the seam of a closed zipper keeps wind and moisture out temporarily. Fabric repair tape works better for flexible surfaces. Tenacious Tape adheres especially well to tents and technical fabric.
Tape is not a long-term fix. But it buys time. And field repairs are often about time.
Fabric Tears and Why They Spread So Fast

A small tear in fabric rarely stays small. Movement pulls at the edges. Moisture softens fibers. Stress concentrates at the weakest point.
The instinct is to sew immediately. That’s not always the best first step.
If the fabric is wet, let it dry if possible. Tape applied to damp surfaces fails quickly. Once dry, apply a patch to the inside first. Press firmly. Smooth it out. Eliminate air pockets.
Tenacious Tape works especially well for tents, jackets, and bags. Gorilla tape handles general structural reinforcement but lacks flexibility for technical fabrics.
If sewing is required, use controlled stitches. Tight stitches can create new stress holes. Even spacing distributes the load more effectively.
A tear is not a disaster. It becomes one when ignored.
Shoulder Straps, Packs, and Structural Failure

Backpacks fail where load meets fabric. Shoulder straps begin separating at the seam. A hole forms near a plastic anchor point. A lid attachment starts to pull free.
When that happens, unloading the pack is more important than threading a needle.
Once tension is reduced, reinforce the area. Stitch across the weakened section. Then add backing tape or a patch to spread the load. Avoid over-tightening. Over-tight stitches cut into fabric fibers and accelerate failure.
Dental floss can substitute for thread in emergencies. It’s stronger than it looks.
Backpacks don’t usually fail suddenly. They fail progressively. Catching it early makes the difference between inconvenience and gear loss.
Tent and Sleeping Bag Failures in Wet Conditions

A tent tear in dry weather is manageable. In wet conditions, it’s urgent.
Apply the patch material inside first. Reinforce outside only if necessary. Broken poles can be stabilized using a tent pole repair sleeve, effectively a splint that slides over the damaged section.
Sleeping bag zipper issues require immediate containment in cold environments. If the zip cannot be restored, sewing a short section closed may preserve insulation.
These are not elegant solutions. They are functional ones.
Building a Field Repair Kit That Actually Works

A field repair kit should be compact, versatile, and realistic.
It should include pliers, a needle, thread, scissors, a knife, tape, a spare zipper slider, and small stopper pieces. Electrical tape and spare fuses are useful if electronic gear is involved. Adhesive patches handle fabric repairs quickly.
Portable generators power pneumatic tools in industrial settings, but personal outdoor gear repairs rely on manual tools and controlled technique.
A good repair kit isn’t about carrying more gear than necessary; it’s about being prepared to solve small failures before they turn into larger problems.
Preventative Maintenance Before You Ever Need Repairs
Most zipper issues give warnings before failure. Snagging. Gaps between teeth. Resistance during movement. Inspect both sides regularly. Clean debris. Store gear dry. Avoid extended periods of neglect. A little preventative care saves money and reduces emergency repairs. Most field repairs are avoidable with minimal attention.
Final Perspective on Field Repairs
Field repairs aren’t about craftsmanship or making something look new again; they’re about keeping your gear operational long enough to finish the trip. A bent slider, worn zipper teeth, a torn patch of fabric, or a separated seam may look serious at first glance, but in most cases, they don’t signal the end of a piece of equipment. More often, they simply mean you need to slow down, assess what actually failed, apply pressure in the right place - whether that’s tightening a slider, reinforcing stitches, or patching fabric - and then keep moving. When you’re days from a shop, restoring full factory condition isn’t the objective; preserving function is, and that’s usually enough.


Share: